Showing posts with label birthdays. Show all posts

Monday, January 10, 2011

My baby isn't a baby anymore!

He is 3 years old now!!!  He was born on New Year's Eve...lucky guy will always have a rockin' party on his birthday.  :)

He wanted a Superman cake this year.  I had big plans.  BIG ones.  But when your kitchen looks like this, it's hard to bake a cake.

What did I do?  I bought one of these (but it had blue flowers and sprinkles on it)...

And scrapped all of this off...

And turned it into this...

And he was so happy!

Happy Birthday little man.  We love you and are so happy you are part of our family (and finally potty-trained...NO MORE DIAPERS!!!)

Wednesday, May 19, 2010

Happy Birthday Giveaway!!

Saturday is my Birthday.  I'm going to be 33...Aaaahhhhh!  What better way to celebrate than with a giveaway?!

So here's the deal....I'm going to give one lucky person $30 to spend in my etsy store and a $25 giftcard from your choice of Hobby Lobby, JoAnn Fabric, Michaels, or Home Depot and some of these oh-so-tasty red velvet cake balls.  Ok, just kidding on the cake balls.
 

Here's a sneak peek at what's in my store.

Seriously people...who could pass this up?!  The giveaway starts now and goes until Sunday night (11:59 pm eastern time).  There are 3 super easy ways to enter.

1.  Become a follower and leave me a comment telling me so.
2.  Go to my etsy store and look around.  Then come back and tell me your favorite thing.
3.  Tell your friends!  Give my birthday giveaway a shout out on your blog, facebook, or twitter and leave me a comment telling me what you did.

p.s.  My Messy Monday and Transform Tuesday linky parties are still going on so LINK IT UP!!

I want to have a HUGE birthday party, so I am linking this up to EVERYONE!

Friday, April 30, 2010

Foodie Friday -- Tasty Treats for Mom

Here are some special treats you can fix for Mother's Day that are sure to please.  If you scroll down to the bottom, you can also see the birthday cake I made for my hubby last week.

Homemade Oreos
  • 1 German Chocolate Cake Mix
  • 2 eggs
  • 1/2 cup oil
  1. Mix all ingredients thoroughly.  Dough will be pretty thick.
  2. Roll into 1 inch balls and place on cookie sheet about 1.5 to 2 inches apart.  (should make about 48 dough balls)
  3. Bake at 350 for 8-10 minutes.  You know they are done when the tops crinkle.
  4. Let cool on pan for 2-3 minutes and then place on cooling rack.
  5. While cooling make the frosting (recipe below)
  6. Frost the bottom side of one cookie and then sandwich it together with the bottom side of another cookie.

Buttercream Frosting
  • 1/2 cup butter, softened
  • 1/2 cup shortening
  • 1 tsp clear vanilla (or another flavoring extract)
  • 4 cups powdered sugar
  • 4-6 Tbsp water (or amount needed to get proper consistancy)
  • Food coloring if desired.
  1. Cream butter and shortening together.
  2. Add powdered sugar and mix well.  Add vanilla and water a Tbsp at a time until you get to the correct consistancy.
  3. Add food coloring if desired.
This is such a quick and easy recipe that takes very little time.  My kids love to help make these and they taste great too.  Can't beat that!  Any mother on your list would love to get these for a treat.  Or you could accidentally leave your computer on with this page pulled up and maybe the man in your life will get the brilliant idea that you would like these for Mother's day.  HINT! HINT!

What?  A girl can dream...right?!

As promised, here are the pics of the Transformer Birthday Cake I made for my hubby.  His birthday is 3 days after E's birthday, so we spent the week gorging on sugar celebrating together.  It was so fun.

Each year the kids decide what kind of cake I should make for Dad.  Last year was R2D2.  That cake just about did me in!  Decorating it was what made me decide to learn how to make and use fondant.  This year they decided on Transformers.

The cake is just a yellow cake mix.  The frosting is Chocolate Buttercream (same recipe as above except add a heaping 1/4 cup cocoa powder.  The Transformer face is made of marshmallow fondant.

I think it turned out pretty well.  I wish I would have covered the entire cake in fondant to give it a more smooth finish, but I was pressed for time, so I only did the face.  It still looks good though.

p.s.  My son just gave me a hug and patted my stomach and asked me why my tummy is getting so big.  NICE!  I think next week's Foodie Friday will be a recipe for a super healthy, low fat, low calorie, and absolutely delicios Something or Other.  :)

I'm linking this up to these blogs.  Go check them out!
Blog+Button+to+size.jpgJoin us Saturdays at tatertotsandjello.com for the weekend wrap up party!

Friday, April 23, 2010

Foodie Friday -- Birthday cake anyone?

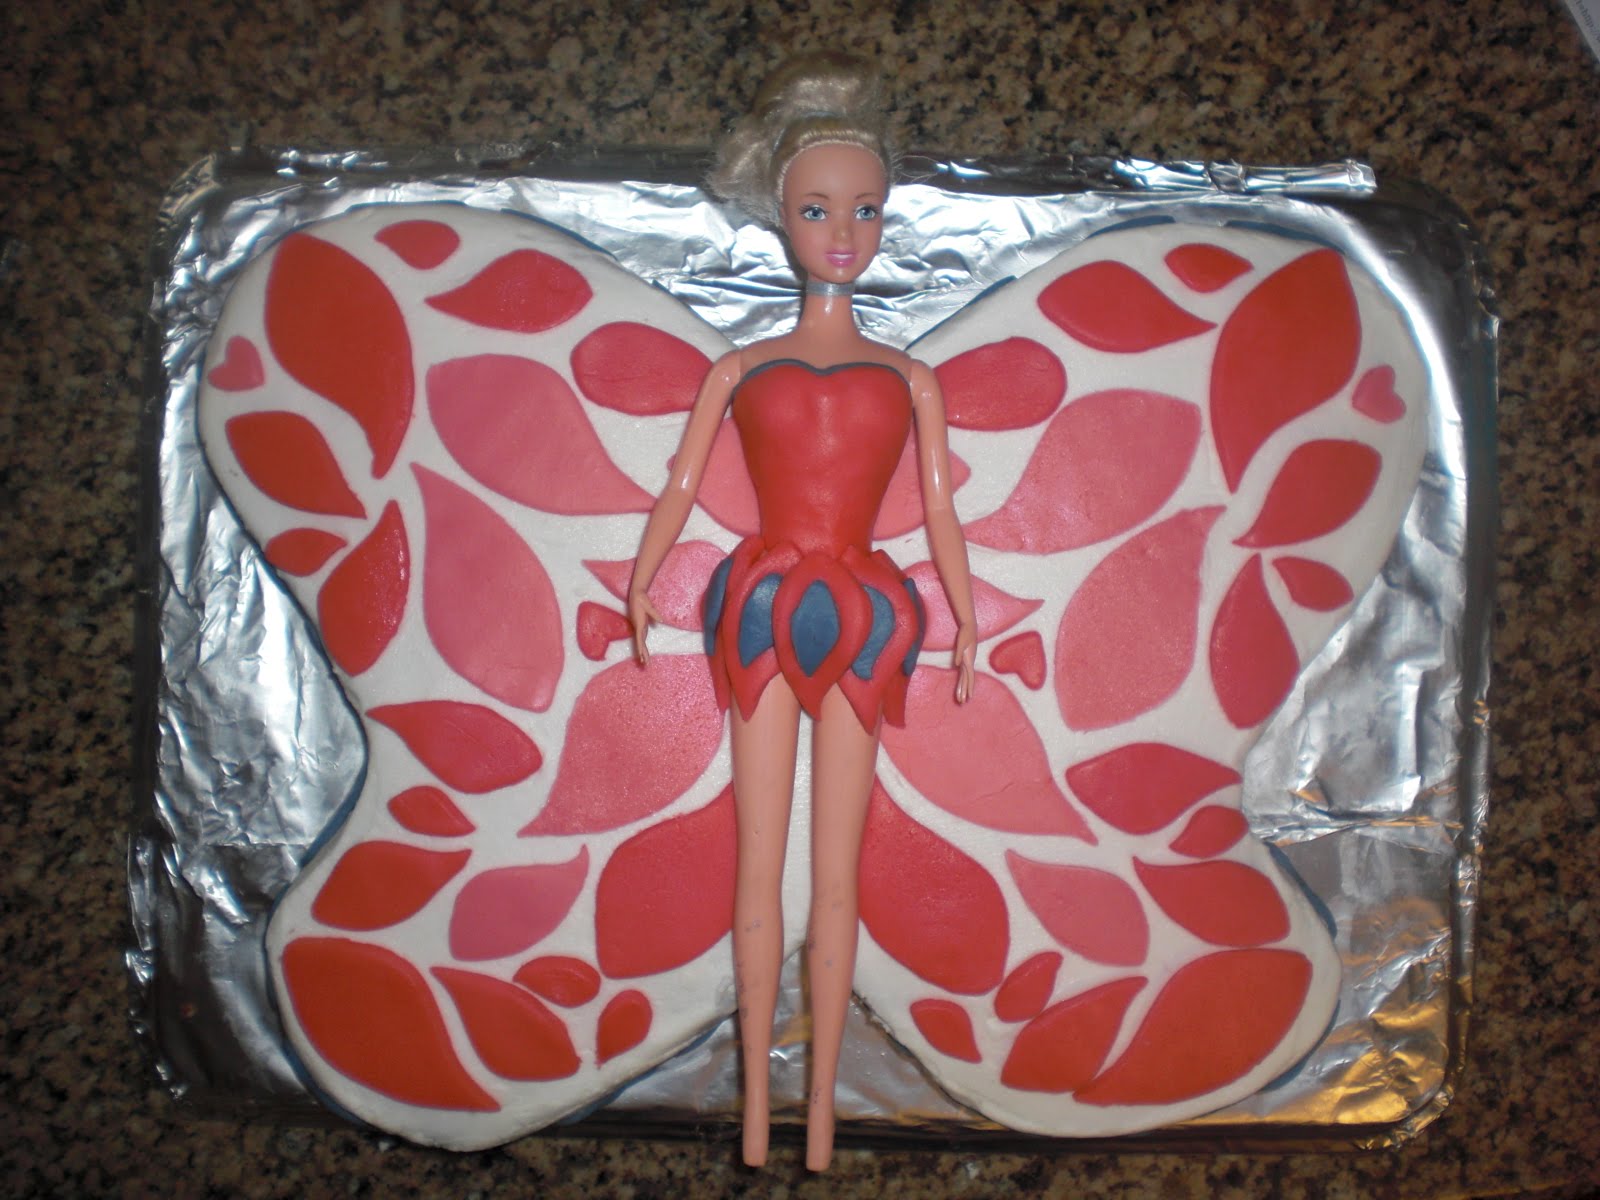
As I mentioned here, it was E's birthday this week.  Every year I let the kids decide what type of birthday cake they want.  At first it was pretty easy, but as they have gotten older, their cake requests have gotten more challenging.  E wanted a Barbie Mariposa (butterfly) cake

I used 2 cake mixes in a large pan that my neighbor gave me.  She said it could hold 2 mixes, but I had never tried it before.  As it was baking it started rising higher and higher and I started panicking.  I thought for sure it was going to spill out of the pan and all over my oven.  It got right up to the tippy top and even a little higher, but never did overflow.  Thankgoodness!!!

And here is the finished cake!

Today is my hubby's birthday, and I have big plans for his cake.  Check back next friday for the pics!

I'm also linking this up these sites.  Go check them out and see what everyone else is up to.


giveaways
Favorite%2BThings%2BFridaybig%2Bbutton.jpg

Wednesday, April 21, 2010

Whatever Wednesday -- Locks of Love -- Before and After

Yesterday was E's birthday. She is 7 years old and I just can't believe it! She got to pick who said dinner prayer and she chose me. As I was thanking Heavenly Father for our family and for her I started crying. I'm just so amazed by her. She is strong willed (like me), but kind and loving. She doesn't see color or disability. Her best friend is a little boy from school who is in a wheel chair and has many physical challenges. She loves him and is so tender with him. How can a girl as young as her have such a big heart? E is special for many reasons, but most of all because she made my life-long dream come true. She made me a mother.

When she was in kindergarten she came home from school one day telling me all about Locks of Love. It is a not-for-profit organization that provides hair pieces to underprivileged children who have lost thier hair for some long-term medical reason. She decided that she was going to grow her hair out to give to the kids who need it more than she does. Every couple of months she would have me measure it and see how close she was getting. You have to have at least 10 inches to donate.

We measured it yesterday morning and she finally had 10 inches!! She was so excited and immediately said that she wanted to cut it on her birthday so she could give a special birthday present to someone. Last night after her party we cut it. She loved her long hair and isn't sure about how short it is. I think it looks absolutely adorable and I told her I was sure others did too. So lovies, if you think her hair is cute, would you please leave a comment and tell her? Thanks so much!!

p.s.  don't forget to check back on Friday to see the cake I made for her.  It turned out pretty amazing...even if I do say so myself!!

I also linked up the these sites.  Go check out what everyone else is up to.

Show and Tell Green

Monday, November 16, 2009

How to make a piƱata without using Paper Mache

My son really wanted a piƱata at his birthday party, but I couldn't find any that weren't pink or Dora...and they were at least $15 a piece.  I thought maybe I could make one for cheaper, and so I set out on a quest to figure out how to make a piƱata.  Everything I read said that you have to use Paper Mache which I have done before, but I don't love it.  It takes a long time and is messy.  I was stumped.

Then the weirdest thing happened.  I went to be thinking about how to make a piƱata and I woke up knowing how to do it.  My brain must have worked on it all night, because I went downstairs and did it without giving it a second thought.  It worked so well that I thought I would give you all a piƱata making tutorial.

1.  You will need a cereal box (or some other type of cardboard box, but it can't be too industrial or the kids won't be able to break it), a roll of streamers in the color you want, masking tape, scissors, and twine.  I thought I would use the hole punch reinforcers, but I just used the tape instead.
2.  Cover the bottom of the box with a strip of streamer.
3.  Cut slits into the streamer going half way up.  Make the slits about 1/2 an inch apart.  You don't have to measure it, just eyeball it.  You also don't need to make them perfectly spaced.  This creates the fringed look.
4.  Begin wrapping the streamer around the box.  I taped it down on each side each time I went around.  You want the streamer securely attached to the box.  Wrap it so that it overlaps.  Keep the wraps close together and it will look fuller when you get done.
5. Just keep wrapping until you only about 1.5 to 2 inches at the top of the box.
6.  On both sides of the box, you will need to put 2-3 layers of tape on both the outside and inside of the box.  After you have the tape in place, take your scissors and punch a hole through the box.  The tape makes the holes stronger.  Then run your twine through.  You can use twine, yarn, rope, or whatever you want.  Just make sure it is strong enough to hold the piƱata while people are hitting it.
7.  To finish off the box, keep wrapping around until you get to the top.  Just work around the twine sticking out the sides.  At the top, you will want to make some tape balls like the ones pictured here.  It will take 2 strips of streamer to cover each top flap.
8.  I found it easier to cut the slits after I had the streamer taped to the box.
9.  Cut a space out of the streamer where the box lid closes so that you can close it when you are done.
10.  Cover the other flap the same way, and leave the little tab uncovered.  You won't see it when you close the box.
11.  You can tape the box shut if you want to.  I did not and it wasn't a problem.  Of course it was a bunch of 5 year olds whacking it, not adults.
12.  To finish it off, I used a Spiderman napkin.  I could have just taped the napkin on like this and my son would have been happy with it, but I decided to take it a step further and cut Spiderman out of the napkin and put him directly to the box.
13.  The last step is to "fluff" your fringe and then you are done.  Enjoy!!

How much did this cost?  The box, tape, and twine I already had.  I bought the streamer and napkins at Wal Mart.  The streamer was $.97 and the napkins were under $3.00 for a pack of 16.  Now that is a cheap piƱata!

I'm also linking this to Metamorphasis Monday over at Between Naps on the Porch.  Just click on the link and it will take you back so you can see what everyone else is up to.