Showing posts with label crafts and activities. Show all posts

Monday, October 18, 2010

Messy Monday -- DIY Watercolor Paint

These are the BEST!  My kids love to paint, but we used to go through watercolor paints like crazy.  I decided there had to be a way to make my own.  We love it so much, I just had to share with you!

Watercolor Paints
  • 4 Tbsp Baking Soda
  • 2 Tbsp White Vinegar
  • 2 Tbsp Cornstarch
  • 1/2 tsp Glycerin (available in any pharmacy)
  • food coloring
  • ice cube tray
  • tooth picks
  1. Mix the baking soda and vinegar in a small bowl until fizzing stops.
  2. Add cornstarch and glycerin and mix thoroughly.
  3. Spoon evenly into ice cube tray.
  4. Add food coloring to each ice cube slot and mix thoroughly.
  5. Mix and match colors until you have all of the colors you want.
  6. Let dry overnight.
  7. Use as regular watercolors.
This will crumble easier than store bought watercolors, but since it is in an ice cube tray it is much less likely to come out and make a mess everywhere.
Hint:  I make 2 of each color so that the tray can sit on the table between 2 kids.  Then they each have the same colors and don't fight about who is using what.
What have you done for Messy Monday?  Link it up!

1.  Use the link to your actual blog post, not your blog address.
2.  Grab a Messy Monday button and put it in your blog post or somewhere on your blog.


3.  Go check out what everyone else is up to and leave them some comment love!

I'm linking to these sites.  Go check them out! 

Monday, October 4, 2010

Messy Monday -- Follow your kid's lead

Reminder:  If you want to know why I'm shaving my head click here.

Have you ever asked your kiddos what they would like to do for Messy Monday?  I did.  I was expecting some huge project, so the answers I got really surprised me and made me realize that all they really want is for us to love them and spend time with them.  Feel free to set some parameters...We're not going to go anywhere or spend any money...we have to use what we already have...no video games...etc.

Question:  What would you like to do with me today?

Answers:

Daisy:  I want to do a craft wtih you.  Maybe we can paint some pictures and then turn them into something...like a special book or something.  (give this girl a gluestick and some paper and she is in heaven.)

J-Man:  I want to snuggle and read lots and lots of books with you. (melt my heart)

Princess:  Let's bake something.  And I can wear an apron and you can wear an apron and we can make it together and then we can eat it.  And the other kids can eat it too!!  (girl after my own heart)  recipe here.

the Babe:  CARS!!!  I wanna play CARS!!!  (give him some cars and he will play happily for an hour or more)

So, guess what we are going to do for Messy Monday?  Yep!  And I'm going to love every second of it.

What have you done for Messy Monday?  Link it up!

1.  Use the link to your actual blog post, not your blog address.
2.  Grab a Messy Monday button and put it in your blog post or somewhere on your blog.


3.  Go check out what everyone else is up to and leave them some comment love!

I'm linking to these sites.  Go check them out!

Monday, September 20, 2010

Messy Monday -- Paper Lanterns

This is a super easy craft that kids will LOVE!

Paper Lanterns
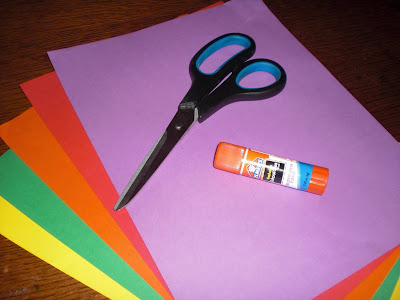
  • colored paper
  • scissors
  • glue stick or tape
  1. Off of the short side of your paper cut a strip about 1 in. wide.
  2. Fold your paper in half.
  3. Starting at the fold, cut strips 1/2 in. to 1 in. wide leaving 1/2 in. to 1 in. at the edge.
  4. Open your paper and glue the last strip on one side.
  5. Take the edges and place one on top of the other.  This will turn it into a ring and glue it together.
  6. Glue the stip you originally cut off to the top, making a hanger
  7. Step back and enjoy your handywork.

You can also use colorful scrapbook paper or pages from a magazine.  If you decide to use magazine, it works best to glue it to a sheet of regular paper and let it dry completely before doing the other steps.
What have you done for Messy Monday?  Link it up!

1.  Use the link to your actual blog post, not your blog address.
2.  Grab a Messy Monday button and put it in your blog post or somewhere on your blog.


3.  Go check out what everyone else is up to and leave them some comment love!

I'm linking to these sites.  Go check them out!

Monday, August 30, 2010

Messy Monday -- A is for Apple

A is for apple...and aren't these apples the cutest?  They are super simple too.


Materials
  • Red yarn
  • Green yarn
  • Yellow yarn
  • Brown yarn
  • Scissors
  • Cardboard
  • Pipe Cleaners (optional)
  1. Wrap your red yarn around your cardboard 100 to 150 times.
  2. Fold your cardboard so that it pushes the yarn up and you can get your fingers underneath it.
  3. Slide a piece of brown yarn (about 7-8 inches long) under the yarn.
  4. Tie the brown yarn as tight as you can around the other yarn.  (this is where pipe cleaners could be used instead)
  5. Slide your finger under the knot you just tied and hold onto the yarn while you remove the cardboard.
  6. Tie another knot across from the first one you tied and your yarn will turn into a cute little circle.
  7. For the underside of the apple, tie the brown knot 3-4 more times and then cut it close to the knot.
  8. For the top side of the apple, tie the brown yarn 10-15 times one right on top of the other.  This will make the stem.
  9. If you want leaves on your apple, there are 2 ways to do it.  Slide 2 pieces of green yard under the knot you tied with your brown yarn.  Then them into a little bow making sure that the ends are short.
  10. Or you can add 2 pieces of green yard to the red yarn before you tied it with the brown yarn.  Then tie a little bow making sure the ends are short.
  11. If you want green apples or yellow apples, do the same thing with different colors of yarn.
What have you done for Messy Monday?  Link it up!

1.  Use the link to your actual blog post, not your blog address.
2.  Grab a Messy Monday button and put it in your blog post or somewhere on your blog.


3.  Go check out what everyone else is up to and leave them some comment love!

I'm linking to these sites.  Go check them out!

Monday, August 23, 2010

Messy Monday -- Crayon Rubbings

This is a super simple idea that my kids love.

Crayon Rubbings
  • crayons (or chalk)
  • paper
  • items to rub (they need to be somewhat flat)
  1. collect different items to rub
  2. place your paper on top of the item
  3. using the side of your crayon or chalk, rub it over the item
Here are some leaves that we did this past fall.  You can also do money, wood grain, concrete, vinyl letters or shapes, etc.  Just use your imagination and see what you can come up with.

What have you done for Messy Monday?  Link it up!

1.  Use the link to your actual blog post, not your blog address.
2.  Grab a Messy Monday button and put it in your blog post or somewhere on your blog.


3.  Go check out what everyone else is up to and leave them some comment love!

I'm linking to these sites.  Go check them out!

Wednesday, August 4, 2010

Whatever Wednesday -- Cutest Little Bows

Aren't these the cutest little things you have ever seen?  I love them.  I first saw jumbo ones made out of paper at Christy's Creative Chaos.  I loved them so much I decided to try and make them out of ribbon.  I showed you how to do that here.

I love how easy they are and how quickly they go together.  My only problem with them is how heavy they are when you use a hot glue gun to put them together.  I was thinking about it while I was falling asleep the other day and when I woke up I knew just how to do it with a needle and thread.  I tried it today and I love it!  I made some mini ones using 1/2 inch ribbon, but you could yse the same technique to make bigger ones.

Mini Bow Tutorial
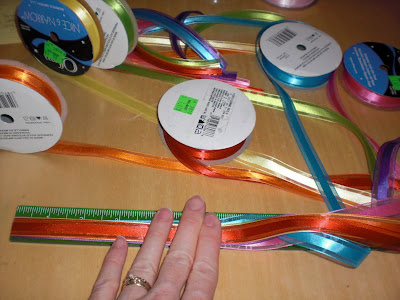
  • 1 yard 1/2 in. ribbon
  • scissors
  • ruler
  • matching needle and thread
Cut your ribbon in the following increments.
  • 4 - 6 in. pieces
  • 2 - 5 in. pieces
  • 1 - 2 in. piece
  1. Starting with your long pieces, make a loop in each end and have it meet in the middle.  Follow the pictures to see what it is supposed to look like.
  2. Holding the loops with one hand, stick your needle up through the middle of your ribbon.
  3. Continue making loops and stick them on your needle.  You will want each set of 2 ribbons to make an X and then offset the X's so that it fans out like a bow.
  4. After you are done with all of the long pieces, use the medium pieces and do the same thing.
  5. With your last piece make a single loop.
  6. This could be a little tricky, Holding the loop, push the needle up through it and then feed the needle back down through all of the ribbon.  Then tie it off on the underside of your bow.
  7. There you have it!  If you want to make bigger bows, just use 1 in. ribbon and double the length of each piece.
You could use these to wrap packages, embelish scrapbook pages, on hair clips or headbands.  I think I'm going to glue some alligator clips to the back of these for my girls.  What do you think? 

I'm linking to these sites.  Go check them out!

• Show and Tell @ Blue Cricket Design
• We Did it Wednesday @ Sew Much Ado
• Transformation Thursday @ The Shabby Chic Cottage
• Strut your Stuff Thursday @ Somewhat Simple
• Favorite Things Friday @ A Few of my Favorite Things
• Frugal Friday @ The Shabby Nest
• Home and Family Friday @ Home is Where my Story Begins