Showing posts with label product reviews. Show all posts

Friday, January 21, 2011

Feature Friday -- Smart Seat Chair Covers

This past fall Becky from Smart Seat Chair Covers contacted me about a awesome new product on the market and asked me if I would be willing to review it on my blog.  As soon as I saw what her product was I said "YES, please let me review it!"  I got it in the mail 3 days later.

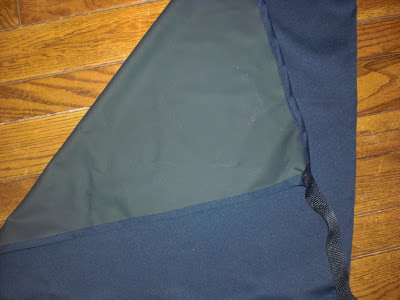
It is a seat cover that is stain resistant, waterproof, and washable. Did you catch all of that?   It comes in 3 colors, navy blue, khaki, and black.  Their website shows exactly how to use it on different types of chairs and their customer service is excellant.  It is slightly narrower on one end and has velcro strips so that it can strap on under the seat of your chair.  It is very simple to use and is quite versatile.  I've had this since November and we have put it through the ringer.  It still looks as good today as the day I got it.

This will be perfect for those of you who have real dining room chairs.  We had lovely ones when we first got married, but 10 years later, they are no longer with us.  They've been replaced with the plastic folding chairs from Costco which are so easy to clean, but not even a little bit attractive.  This is how I used it on those chairs.

As you can see, it didn't fit perfectly on there, but it did cover the seat and kept it clean.  What I really loved it for was putting it under our booster seat that straps on to the chair.  We have used this booster seat for all 4 kids and nastiness always collected on the chair underneath it.  I HATED taking it off to scrub the chair, but with this little beauty, I didn't have to.  I just took the booster off, took the seat cover off and shook the hard stuff into the trash and then threw it into the washer.  Perfection!

Just for kicks I also tried it on the back of the chair too.

I also tried it on a chair in my family room.  My puppy likes to curl up on the chair and I didn't want it to get gross.  Again, it didn't fit perfectly because the chair has T cushions, but it covered the important parts.  The dog didn't like it for some reason and wouldn't sit on the chair with it on there.  So I guess it served it's purpose, just in a different way than I was expecting.  :)

I think you should give these a try.  You can order just one to try out before you buy enough for all of your chairs and Becky and everyone else at Smart Seat Chair Covers is so great to work with.  Want to know my favorite part?  She is a stay at home mom who had a good idea and supportive friends.  They ran with it and now they have a good business.  I am much more likely to support "One of our own" than to run out to the nearest store and buy something similar...not that there is anything similar.  I absolutely think this is a great product and worth looking into.

Wednesday, June 23, 2010

New You Challenge

I don't know how many of you have noticed the "New You" tab on my sidebar.  If you haven't noticed it, then you are missing out on a really great opportunity!  If you don't want to read the whole post, I'll give you the Cliff's Notes version.
A really great friend of mine emailed me in February and asked me if I wanted to run a half marathon with her in October.  I said YES!!!  We decided to do the walking training schedule first, and then to follow the running training schedule second.  We started at the beginning of April and this weekend our walking schedule is done!  I can't believe it!  We have both done 1/2 marathons before, but it was atleast 1 kid ago for each of us.

I've learned/remembered several things during this process.  First, this is a major time committment, but definitely worth it!  Second, there is nothing sexy about pushing 4 kids on the stroller while dripping sweat from every possible pore in my body.  Third, I have officially graduated from the "spring chicken" category.

About a month ago I was reading my friend's blog and she posted about these amazing new shoes she got.  She said that wearing them while working out has made all of the hip pain she was feeling go away...completely.  I have been having knee pain, hip pain, and lower back pain since I started training, but just assumed it was because I'm not as young as I used to be.  As soon as I heard her talk about these shoes, I was interested.  My husband and I did some major research on these particular shoes, and decided to give them a try.

They are called Vibram Five Fingers.  They look really strange don't they?  I've only had them for about 2 weeks, but so far so good!
 

This is the kind I got.  I wore them to walk in for the first couple of days.  They feel weird the first few times you wear them and they are a bit tricky to get on at first, but it doesn't take long to figure it out.  My friend said that it would take a week or two to get used to them and to the way your feet will feel in them, but after the initial "breaking in" period, they will be the BEST shoes you have ever worn.  So far, I agree with her.  It did take about a week and a half to get used to them, but now I really like them.  Best of all?  All of my knee, hip, and lower back pain is gone. Completely gone!  However, my feet have felt a little sore when I finish running.  You know, like the soreness of being on your feet all day.  Not real pain, just a bit sore.  For now I am assuming it is because my feet and body aren't quite used to "running barefoot".

I wear mine ALL of the time.  I wear them to the grocery store, to the mall, around the house, and to the gym.  I get a lot of comments on them and even more weird looks.  I am loving the fact that my knee, hip, and lower back pain are gone.  I am interested to find out if the "sore" feeling in my feet goes away.  I haven't decided if I am going to train for the 1/2 marathon in only these, or if I'm still going to wear my running shoes too.  I plan to just take it a day at a time and see how my feet feel.

If you are interested in getting some, you can order them directly from their site, or you can find a licensed retailer to get them from.  We ordered mine from REI.  Here is what they look like on my feet.

Are you interested in joining the NEW YOU challenge?  Just leave a comment saying you want in on the fit and fun.  Every Sunday night I change the training schedule listed on my sidebar so you know exactly what you are supposed to be doing on what day.  I am not a licensed trainer, but if you have questions or need help with something I will do my best to help you.  So, let's get moving!!

DISCLAIMER:  I am not a Dr.  I am not an athletic trainer.  I am a stay at home mom who likes to run.  That's all.  In my research on these shoes I saw lots of people who think they are the absolute best things invented and lots of people who think they are the absolute worst things invented.  They are not for everyone.  You may really like them, or you may hate them.  Just don't hate me for recommending them.  :)

I am linking this up to these sites.  Go check them out!!

• Show and Tell @ Blue Cricket Design
• We Did it Wednesday @ Sew Much Ado
• Transformation Thursday @ The Shabby Chic Cottage
• Strut your stuff Thursday @ Somewhat Simple
• Favorite Things Friday @ A Few of my Favorite Things
• Frugal Friday @ The Shabby Nest
• Home and Family Friday @ Home is Where my Story Begins

Tuesday, February 16, 2010

Removing water deposits

Do you get water deposits around your faucet or on the little drip tray under the water dispenser on your refrigerator?  Or do you see them on the bottom of your glasses after pulling them out of the dishwasher?  Have you tried scrubbing and scrubbing and it won't come off?  Want to know how to remove it without hard chemicals?  Vinegar.  Yes, really.  Just saturate it with vinegar for a few minutes and use the scrubby side of a sponge or scratcher pad or a toothbrush and it quickly and easily scrubs off.

I just cleaned our drip tray yesterday, but I forgot to take a picture.  Here is a picture of someone else's faucet with the water deposits on it.  All of that can be gone with some vinegar and a little bit of scrubbing.

P.S.  I survived a day without sugar and I didn't die.  Let's see how today goes.

Wednesday, January 13, 2010

How to make a pillow case--tutorial

My 3 year old loves pillow cases.  When she was a baby she never got attached to a blanket or a bear or anything which wasn't a big deal most of the time, but certainly would have been nice when nothing I did comforted her.  When she was 16 months old we moved her from the crib to a toddler bed (early I know, but we had another baby when she was 17 months old and we needed the crib).  Almost instantly I noticed that as soon as we laid her down she would slide her little hand inside the pillow case and rub it against her cheek.  Within about a week she started taking the pillow case off the pillow to snuggle with it while she slept.  It took me about 2 months to convince her to leave the case on her pillow and to snuggle with another one.  From that time on, pillow cases are her comfort.  She drags them all around the house.  The only problem is that I have no pillow cases in my linen closet because she has them in her bed and several other places in the house.  Whenever I go and collect them to put in the wash and put away she has a meltdown because I am taking her security away.

I decided that if she got some special pillow cases for Christmas that were just for her, then she might (please, please, please) let me have all of the others back.  So I set to work.  They turned out great and I thought you might want to know how to make them.  I got the fabric from the $1.50 per yard bin at Walmart.  I bought 2 yards and it made 2 pillow cases.  And, I'm happy to report that she loves them and has let me have most of the other pillow cases back.  :)

1.  Find a pillow case you already have and flip it inside out.
2.  Take your fabric (cute isn't it) and fold it inside out (so that the pattern sides are facing each other.)  Then lay your pillow case on top of it.  Make sure to leave an extra 4-5 inches at the top for the seam.
3.  Cut your fabric using the pillow case as a guide.  Don't forget to leave 1/2 an inch for your seams.
4.  Next you need to sew the top.  Start by folding an inch down and ironing it.  Once you have done that, fold 3-4 inches down (depending on how much you left when you cut it) and iron it again.  Once you have done that, you need to sew it.  I sewed it about 1/4 of an inch from the fold.
5.  Now, if you just want a plain pillow case, fold it so that right sides are facing each other and sew down the sides and across the bottom.  Viola!  You have a pillow case.  However, if you want to make it a little more fancy, then do not sew down the sides and across the bottom and keep reading.

6.  Decide what you want for a trim.  I thought trimming it with some ribbon would look nice.  I only had light pink and a lightish purple.  I think dark pink would have been much better, but I didn't have any (don't worry, I have taken care of that problem...whew!).
I thought purple looked better, so I chose purple.  Then I had a great idea.  Wouldn't a stripe of white look really good down the center of the purple?  Of course it would!
I tried to sew the white ribbon to the purple ribbon by just laying one on top of the other and sewing down the middle.  Guess what?  It didn't work.  The white ribbon was all over the place.  So I had to figure out a better way to do it.

7.  The solution?  Iron-on seam tape.  It is beautiful stuff and I use it regularly.  I used lite because that is what I had on hand, but you have to go back and sew it down to make sure it doens't come undone in the wash.  They make a heavy duty kind that is washable, which would have worked wonderfully for this project, but I didn't have any.
My white ribbon was 3/8 in. wide and the Heat and Bond is 5/8 in wide, so I just cut the Heat and Bond down the middle length wise and it fit perfectly onto my ribbon.
8.  All you do is lay it on the ribbon with the paper side facing up and iron it on (follow the directions on the package).  Once it is ironed on, peel the paper backing off and lay it onto the other ribbon and iron them together.
9.  At this point, you can just lay the ribbon onto the pillow case and sew right down the middle of the white ribbon.  It will sew the white ribbon to the purple ribbon and sew them both to the pillow case.
I am kind of a perfectionist, so I didn't do it that way.  Instead I sewed down the very edge of each side of the white ribbon (so you couldn't see any stitches) and then I used more Heat and Bond and "glued" the purple ribbon to the pillow case.  Then I sewed down the very edge of both sides of the purple ribbon.  Totally overkill, but it looks the way I wanted it to, so I am happy with it.

10. Once you have your ribbon on, all you have to do is sew down the sides and across the bottom.  Flip it right side out and you are done!

Happy sewing!!

Tuesday, October 6, 2009

New banner for my etsy store!!!

I have a new banner for my etsy store and I am so excited!!!  I know how to fumble my way through Photoshop, but I am not even close to being proficient with it.  I wish I was more gifted with graphic design, but I am much better with a hot glue gun and a sewing machine.  Cute models help too!

I have wanted a new banner for my etsy store for a while, but haven't had the slightest clue on where to start.  A friend of mine from college made one for me.  Did I mention that I love it?!  You should go to my shop and look at it and let me what you think.  (hint, hint)

She is the owner and designer of Cherry Blossoms--handmade hair accessories and the things she makes are amazing!  I have a link to her store and her blog on my sidebar.  Seriously, go check out her stuff.  You won't be disappointed!  She is ALSO the owner and designer of a graphics design shop called With Sprinkles On Top.  What can I say?  She has talent dripping from her fingers and I am lucky enough to call her my friend!

p.s.  don't forget my hooded towel giveaway.  It ends on October 16th.

Monday, October 5, 2009

How to get the stink out of towels

While the hair bow tutorial is having technical difficulties, I thought I would post something else.  The bow tutorial is coming soon...I promise.

Please tell me that I am not the only one who has come across a clean towel that smells fine when dry, but once it becomes wet it STINKS!  A couple of years ago I made it my mission to figure out how to get the stink out.

I have tried baking soda, vinegar, OxiClean, extra detergent, combos of all of them.  Nothing worked and I just couldn't justify throwing them out and buying new ones.  Well, all of that investigative work finally paid off!  Want to know what the trick is?  You have to stand on one foot, close your left eye and chant "stink-be-gone" 3 times per towel while they are in the washer.  :)  Just kidding.

The trick is Clorox 2 for colors.  Just use the normal detergent you always use, add 1/2 a cap full of Clorox for Colors and use hot water.  You can also throw your fabric softener in if this is what you normally do.  Put your towels (or whatever else might stink---your son's socks) and let the washer do the initial agitation.  Then turn the washer off and set the timer for 30 min.  Once they are done soaking, turn the washer back on and let it run through the rest of the wash cycle.  Then just dry them as usual.

That's all there is to it.  The stink is gone and you didn't have to throw them away and buy more.  If have never come across anything that this didn't work for.

By the way, don't forget to enter my hooded towell giveaway.  It ends on October 16th!!

Tuesday, September 15, 2009

Do you know the number to Poison Control?

When E was born the Dr. gave me a magnet with the phone number to poison control and told me that I needed to memorize it.  She said, "Hopefully you will never have to call it, but you need to know the number just in case."  I did memorize the number, and it has come in handy several times over the last 6 years.  I have had to call it for my own kids, and had to give the number to others for their kids.  Every time I have called it, they have been EXTREMELY nice and helpful and whatever the issue was, it was never a big problem.  I have never had to take a child to the ER...until yesterday.

I will spare you all the details, and just say that B ate a pill (I still don't know where she found it) and when I called poison control, they told me to take her to the emergency room.  They had to monitor her heart rate, pulse, blood pressure and breathing for 6 hours.  She also had to drink charcoal to try and absorb anything that was in her stomach.  Once she got a few readings of normal, they released us and we got to come home around 9 pm.

If you find yourself in a similar situation, here is the information you need to know.  The National Poison Control number is 1-800-222-1222.  It is staffed locally by Doctors and nurses. Every time I have had to call it, they have always been very kind. No one has ever talked down to me or made me feel like a bad mom.

I remember as a kid seeing the Mr. Yuk stickers on things that we weren't supposed to touch.  I have never put them on anything in our home, but I think I am going to order some and put them on everything that may be harmful to my kids.

Here is the link to the Mr. Yuk store. It has lots of great information. Some of it you can view as a pdf link without having to buy it. It is worth checking out and making sure you know what things are dangerous and how to safeguard your family...especially your children.

Saturday, August 29, 2009

Pre-school Supplies!!

I am teaching a pre-school for B in our home.  There will be 4-5 other kids from church attending.  It will be 2 days a week for a couple of hours.  I am so excited!!!  I already have the calendar and schedule of lessons ready.  I also have a good start on the lesson plans for the first couple of months.  I have to do some fine tuning and get to the library to check out all of the books we will be reading, but I am pretty close to being ready to go.

Yesterday I got a HUGE box of goodies from Oriental Trading Company.  I orderd some crafts and school supplies from them.  If you haven't ever been to their website, you should check it out.  You can get things in bulk (usually groups of 12) for very inexpensive.  I haven't had any issues with quality and I have been very pleased with the products.  I was able to order all of the craft/activity supplies for our group from the start of school through Christmas.  The best part?  The max I will have is 6 kids, so I will have enough to use again in 2 years when I teach 3 yr old preschool for C.  I'll post some pics of the finished projects throughout the school year.

Monday, August 3, 2009

Weekly Cleaning Schedule

The month of August means lots of things to me.  It means summer is almost over, school is about to start, the weather will soon cool down, the leaves will soon start changing.  It is a bittersweet month for me.

It is also the month that I blitz my house and take care of everything that needs attention so I can start the school year off organized and ready for anything.  I think I will take the next few weeks to focus on organization and how I do it.  Hopefully you will get some good ideas and can share a few with me!

Let's start with a weekly cleaning schedule.  I know it doesn't sound very exciting, but it is quite helpful in making sure that I don't get behind on anything.  Playing catch-up is never fun and I try to avoid it.  There are things I do everyday and things I only do once a week.  I'll list the every day stuff first and then show you how it fits into my weekly schedule.

I do laundry everyday.  When I had less kids I did it once or twice a week, but if I were to do that now, it would never get done.  I try and do 3 loads a day Monday through Thursday.  This pretty well takes care of the clothes and towels.  On Friday I wash all of the sheets.  Yes, I do them every week.  This is just a personal preference.  I do all of the loads in the morning and try to fold them as soon as they come out of the dryer.  Sometimes this isn't possible, but I try.  I try and get all of the laundry put away as I go and hope to have it all done by lunch...if not by lunch, then by the time the kids get home from school.

I vacuum and sweep the main level (kitchen, family room, dining room, and living room) every day.  We don't wear shoes in our house and I hate feeling "stuff" under my feet while I walk around.  Vacuuming and sweeping every day seems to take care of it.  I do this after dinner every night.  Then we are able to start fresh each morning.

Monday:  Laundry and Mopping.
  • I put a load of laundry in while I make breakfast.  I switch while the kids are eating and then again after the kids go to school.  Around 9 am I put the last load in the dryer and when it is done I put it all away.  While the laundry is going I mop the kitchen floor.
Tuesday:  Laundry and Dusting.
  • I like to use Endust and an old washcloth.  Feather dusters don't really dust.  They just move the dust around and stir it up.   I have to admit that dusting is the one that is easiest for me to slip on, but my son has allergies to dust, so I try and keep up on it.
Wednesday:  Laundry and Bathrooms.
  • I scrub each bathroom every week.  I like to use Clorox disinfecting wipes, The Works toilet bowl cleaner, Comet Mildew Stain Remover.  After I scrub everything, then I sweep and mop the floor and clean the mirrors with a generic window cleaner.  I have tried generic cleaning supplies, but I really do like the way these clean better.
Thursday:  Laundry and Kitchen.
  • Clean out the fridge and wipe it down, scrub all of the countertops, and wipe down all of the cabinet doors.  I also have to take all of the little piles of paper and other randomness that has found its way onto my kitchen counter over the last week and clean/sort/throw away/put away all of it.
Friday:  Laundry and Vacuuming.
  • This is the day I do the sheets.  The kids don't have to make their beds this day and they think that is pretty cool.  :)  I also vacuum my entire house including the stairs. I do the edges too and if I remember, I check for spider webs.
Saturday:  Outside, special projects, and family time.

Sunday:  Day of rest and after a week of hard work, you deserve it!

One of the benefits of doing your cleaning this way is that everything gets cleaned every week.  Then if something crazy happens...like you get sick, or break a leg, you don't have to worry about your housework.  Everything was just cleaned last week, so it can wait until next week if needs be.

Monday, July 13, 2009

Strollers

We just got back from vacation and it was FANTASTIC!  We went camping in Nauvoo, Illinois for a week.  It rained for 3 days, but it didn't even matter.  We had so much fun just being together. 

So why is the post about strollers?  Because we have the most amazing stroller I have ever seen and every time we go out we get asked about it.  It is a Valco Baby Tri-Mode Twin.  We also got a couple of add on accessories.  There is a toddler seat that goes on the front and a hitch-hiker ride along that attaches to the back.  Do you realize what I am saying?  I can get ALL 4 of my kids on the stroller at the same time--safely!    It's amazing!!! 
This is what it looks like with the toddler seat on the front.  It also has a rain cover that goes over all 3 of the seats.  It came in really handy when we were out and about in the rain.  Unfortunately I didn't get a picture of the kids in it on our trip.  The only picture I can find of everyone on it is from E's first day of school last year.  You can tell in the picture that they are pretty done with me taking pics.  :)

These are expensive strollers, but for a mom with multiples or lots of small children at home, I say it is TOTALLY worth the price.  It gave me freedom.  I can take my kids to the zoo or the mall or wherever I want to go by myself and still keep a handle on them.  I can also walk the kids to and from school everyday and if I want to I can go jogging...because it is also a jogging stroller.  If you decide you want to buy one of the beauties, go to http://www.joggermon.com/  Kelly is the owner and mother of triplets plus one.  She was fantastic to work with and very personal.  She even called me a month or so later to see if we were happy with our purchase.  She also gave us a discount and threw in 2 free cup holders. 

There is a lady that we pass every morning on the way to school and one day she told me that she looks forward to seeing my "parade" pass by everyday.  That made me smile for atleast a week.


What if you don't need one so huge?  Well there are TONS of options.  You can go super basic with an umbrella stroller like this one.  I keep one similar to this in the car too.  You can get an umbrella with a few extras, or a double side-by-side umbrella.

You can get a single stroller that will hold your baby carrier and then can be used for your child until they are bigger like this one.  Or you can get a double front-to-back that will hold a baby carrier and an older child and eventually two older children.  You can also get attachments that allow kids to sit or stand on the back of the stroller you already have.
Then there are jogging strollers.  There are TONS of different jogging strollers and each of them is a bit different.  JoggerMom is a stroller distributor, and has every different type and style you can imagine.  She can also help you figure out what your needs are.  Best of all, if you live in Southern California she will let you test drive some different strollers so you don't end up buying something that you end up not liking.

Wednesday, July 1, 2009

Mei Tai Carrier Tutorial

Since I posted so many different tutorials on how to wear a mei tai, I thought I would list them all here for ease. So, if you have ever wanted to know how to use a Mei Tai Carrier? Read on...

For the front carry tutorial click here.
For the side carry tutorial click here.
For the back carry from standing click here.
For the back carry from sitting click here.

If you have any questions please email me at pumpkinpatchdesigns@hotmail.com

If you are interested in purchasing a mei tai, you can find them at my store. http://www.pumpkinpatchdesigns.etsy.com/

I have several different patterns available and will be posting new ones as I complete them.

Tuesday, June 9, 2009

Infant Acid Reflux

"Does your baby seem to spit up a lot? Grab your burp cloth and join the group! Infant acid reflux, more accurately known as gastroesophageal reflux, is a common problem. In fact, more than half of all babies experience infant acid reflux during the first three months after birth, according to the National Digestive Diseases Information Clearinghouse.

Although infant acid reflux is most likely after a feeding, it can happen anytime your baby coughs, cries or strains. And it's probably tougher on you than on your baby. Even when soaked in spit up, most babies who have infant acid reflux are healthy and content.

Infant acid reflux typically resolves on its own by ages 12 to 18 months. In the meantime, changes in feeding technique — such as smaller, more frequent feedings, changing position or interrupting feedings to burp — can help keep reflux under control. In a few cases, medication or other treatments may be recommended."  This is directly from the Mayo Clinic website.

I added the emphasis at the end.  That is the part that I want to talk about.

During my 3rd pregnancy I had an ultrasound at 14 weeks that found a subchorionic bleed.  The Dr. said that they are fairly common and not to worry about it.  He said that they usually resolve themselves on their own and are not a problem.  So I didn't worry about it.  2 weeks later I started to have mild contractions (I contracted early with my first 2 pregnancies also and it wasn't an issue).  I continued to contract several times a week, but not regularly for the next several weeks.  The Dr. didn't seem worried, so neither was I.

Six weeks later I had my 20 week ultrasound to see how the baby was doing and to check on the bleed.  The baby was fine, but the bleed didn't resolve itself.  The ultrasound tech said that I had an abruption and that she could see the contractions I was having during the ultrasound.  She also confirmed that they were "real" contractions.  When I met with the Dr. he asked me all sorts of questions about my contractions, if I was having any cramping, or sharp pains, or spotting/bleeding.  He wanted me to document the contractions to see if they were random, had some sort of rhythm to them or if they were caused by certain activities.  To make a long story short, I ended up on partial bed rest for the last three months of my pregnancy and my daughter was born at 38 weeks.

I noticed in the hospital that she was spitting up which I thought was odd.  I was nursing her and I knew that my milk had not come in yet, so I wondered how she could be spitting up when there wasn't much there to spit up.  The nurse told me it was normal and not to worry about it.  When we went home, it just got worse.  I took her back to the Dr. several times those first few weeks because I knew something wasn't right, and I didn't know what to do about it.

The Dr. suggested that I cut out foods that commonly cause issues for new babies...but I was already doing that.  Then she suggested I cut out all dairy for six weeks.  I did that and it did not make a difference.  The Dr. finally put B on Zantac.  Within about a week and a half, she was a different baby!  She still threw up regularly, but she wasn't crying all the time.  She started sleeping better and she was finally happy!  By the time she was nine months old, she was completely off her medicine and totally fine.

Now, fast forward to my 4th pregnancy.  I had complications with this one as well.  The worst of which was problems with my heart.  I also had early contractions, but they weren't as bad as they were with B.  By the time I was eight months pregnant, I was having "episodes" with my heart several times a week and it was affecting my ability to function properly.  All of my children have had shoulder dystocia births (which is where they get stuck in the birth canal...two of them broke a collarbone).  These deliveries are high risk.  So, C was born at 36 weeks.  He was in the NICU for a week and then he was able to come home.  He was born on a Monday and they didn't let me feed him until Thursday (don't worry, he was on IV's).  Even though there was nothing in his stomach, he was spitting up quite a bit.  I instantly suspected reflux.

When he came home, he always ate like a champ.  Then he would cry and throw up a TON then he would cry some more and then he would be hungry again.  It was a never ending cycle of crying, eating, crying, puking, crying...Sometimes I joined him in the crying part because we were both exhausted and miserable.  The Dr. started him on Zantac and I was so excited.  I assumed it would help him as much as it helped B...even though his was way worse.  I didn't really see much difference.  He was also put on Reglan and something else that I can't remember.  They x-rayed his stomach to check for pyloric stenosis and thankfully he did not have it.  Nothing seemed to be helping very much.

We had already elevated the head of his bed and kept him propped up after each feeding.  I was feeding him less, but more often...we did everything.  Finally the Dr. decided to put him on Prevacid.  It made his hair fall out in chunks!  I was horrified and stopped it immediately.  The Dr. said that that isn't one of the side effects listed by the manufacturer, but it happened when he was on the medicine and stopped when he stopped it.  If you look it up in Google, it is also a side effect that some people do experience.

By this point, we were desperate!  We went to a pediatric gastroenterologist and he put us back on Zantac and added Mylanta Supreme.  Wonder of wonders, that combination worked!  From that day, I noticed big changes in C's temperament.  He still threw up, but as long as we kept him upright for at least 30 minutes after each feeding, he was a happy baby!!!

It took a lot of experimenting, but we were able to figure out that he couldn't just be propped up a bit after feedings.  He literally needed to be vertical or he didn't do very well.  This was a bit of a challenge because I had three other young children to take care of too.  Sometimes I couldn't hold him when he needed it.  I had a baby carrier that I could put him in, but it was not very comfortable for either of us.  He was a pretty chunky baby (another sign of reflux) and so he was heavy!  I did a ton of research to try and find another carrier that I could use with him for extended periods of time that would not hurt my back.  That's when I found the mei tai carrier.  These are Asian style carriers where you literally tie your baby to your body.  They become a part of you.  I also found that they are pretty expensive.  I looked at several different styles and picked out my favorite parts of them.  Then I combined everything I liked and made my own.  It is what saved both of us during those really hard months.  He didn't outgrow the reflux until right around his 1st birthday.  He still has an easy gag reflex, but he is just fine.

I'm working on some carriers to offer in my store.  Check back soon to see them and to see how to wear them.  Thanks!

Friday, June 5, 2009

Diaper Bags

Let's talk Diaper bags.  At one time diaper bags were, in my opinion like maternity clothes used to be...purely functional.  They did the job, but didn't really add to your appearance at all.  Thank goodness things have changed!

When my first was born I spent a lot of time trying to pick "the perfect diaper bag".  It had to have just enough pockets and places to hold everything I needed, not be monstrously big, and still be somewhat stylish.  I ended up with something similar to this.
When my second child was born (18 months later) I quickly realized that my "perfect" diaper bag wasn't big enough for two kids.  I still had the same requirements as I did the first time.  It just needed to be a little bit bigger.  I ended up with something similar to this.

When my third child was born (20 months after #2) I had to swallow my image pride and get something completely practical.  I used the same bag for #3 and #4.  I had 3 kids in diapers at the same time twice!  I needed lots of room for lots of stuff.  I ended up with something similar to this.

Yes it is big, but it holds everything I need.  Now that my 4th child is almost 18 months old, I am getting excited to put this down and get a nice stylish purse...

There are as many different types of diaper bags as they are types of diapers.  When you are looking for one, you need to figure out what your needs are and what type of person you are.  You also need to decide if you are going to buy a new bag with each new child or if you want it to work for multiple children.

If you are they type of person who constantly has blisters because you just can't make yourself wear more practical shoes that may not perfectly match your outfit, then you may feel like you will have to sacrifice practicality in the name of fashion.  Not necessarily.

If you are the type of person who wears tennis shoes with your suit because comfort is the only way to go, then you may not really care what it looks like as long as it gets the job done.  Finding a fashionable diaper bag that is also completely practical and comfortable might be easier than you think.

Check out these different sites. 

There are tons of options in all different price ranges.  You can also think about using a computer bag with lots of pockets, which was what my second bag really was.  Or you can try a back pack.  They have lots of different compartments for all of the different things you need to carry.  Look through the old purses you already have.  Maybe one of them is big enough or has enough compartments to hold what you need.  Chances are that if you already own it, you already like it.  Or you can look at small duffle bags, which is what the diaper bag I currently use is.

Tuesday, June 2, 2009

Burrito Babies

I have a ton of friends who are either pregnant or are have just had babies.  I think the next several posts will be on all things baby.  This one is about swaddling.  Ever heard of it?  Know what it is?  Know why babies like it?

Swaddling means "to bind (an infant, esp. a newborn infant) with long, narrow strips of cloth to prevent free movement; wrap tightly with clothes." (from http://www.dictionary.com/)

Babies just came from a very snug and cozy environment where there wasn't a lot of room to move around.  When they are born they don't have control of their muscles so they arms and legs tend to flail around.  This can make sleeping very difficult.  Swaddling an infant comforts them and makes it easier for them to sleep.  It helped all 4 of mine anyway.

There are a few different ways you can swaddle the baby.  This is what worked best for us.  Once they get older you can swaddle with the arms out.  Some of mine liked this and some of them didn't.  You can swaddle a baby until they don't like it anymore.  A friend of mine swaddled her baby until she was almost 8 months old.  She wouldn't sleep unless she was wrapped up tight.

1.  You will need a blanket.  I always used a receiving blanket.  It works best if it is square.  If the blanket you are going to use is not square, just fold one edge down until it is.  If your baby outgrows this blanket, just use a bigger one.
2.  Fold the top corner down about 1/3 of the way.  This is where your baby's head will be.
3.  Put your baby onto the blanket.  Make sure they are changed and fed before you swaddle them or you will have to undo them in a few minutes.  (sorry about the naked baby doll.  None of my kids are little enough to swaddle anymore and I couldn't find her clothes.)
4.  Fold either side over the baby and tuck the edge under the baby.  This will keep it secure.
5.  Take the bottom corner and fold it up.  If it is too long and will cover the baby's face, just fold it down a little bit.
6.  Take the other side and fold it over the baby.  Wrap it around and under the baby.
And that is how you do it.  Now you know why we call them "burrito babies".  :)

You can also buy swaddling blankets.  I have never used one, but I have several friends that have used and loved them.  As far as I know, they all work pretty much the same.  Here is an example.

Monday, March 23, 2009

Need some help with your daughter's hair?

My girls ask for "church hair" every day.  When they were little I used to just pull it back on each side and put butterfly barrettes over the elastic.  Well, those days or over.  E told me a little while ago that she NEEDS to have big girl hair for school.  Apparently butterfly barrettes are for babies.

I have done a ton of research on "big girl" hair and have come across several hair blogs that are extremely helpful.  I am linking to a couple of them.  You can find them at Babes in Hairland and Cutie Pie Hair Creations.  There are tons of hair blogs, but I like these two the best.  They give easy to follow directions and the hairdo's are pretty simple, but look great.

I also have some friends who sell handmade hair accessories on etsy.com and you can find them at Cherry Blossoms Design and A Joyful Baby Bowtique.   I love both stores.  I think each of them does such a nice job.  Again, there are tons of people who offer handmade hair accessories, so have fun looking.

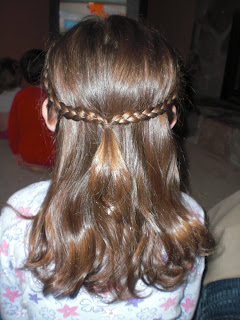
I'm including some pictures of my girls with some of the hairdo's that I have tried from these sites and with some bows and flowers that a friend of mine made for them.  Of course they are wearing them with "big girl " hair too.  I am currently looking for some online tutorials on how to make your own bows and flowers.  Once I find some good ones, I'll post them as well.