Showing posts with label whatever wednesday. Show all posts

Wednesday, September 22, 2010

Whatever Wednesday -- Becoming a "Room Mom"

I somehow got talked into being the "Room Liaison" for Daisy's class.  That's the Fancy way to say Room Mom.  She is super excited.  I'm trying to be.  :)

I talked to the Teacher last Friday and asked what she needed long term and if there was anthing I could do short term until I can get everything organized with the other parents.  She said she had some lamination to cut out.  I said, "Oh sure...no problem."  Then she showed me the lamination she needed cut.  I almost wet myself.  HOLY SMOKES!

This is what I started with.

This is after an hour and a half with my handy-dandy paper cutter (thank you Costco).

This is what I still have left.  This will take me at least a few hours because each strip has 4-6 little squares and there are over 75.  Yeah me!

Wednesday, August 18, 2010

Whatever Wednesday -- Table Runner

 Remember this fabric? 


And how I used it to cover these lamps?


Look what else I made with it!  Oh, you want one for yourself?  Well, okay.  The tutorial is coming soon!


I'm linking to these sites.  Go check them out!

• Show and Tell @ Blue Cricket Design
• We Did it Wednesday @ Sew Much Ado
• Transformation Thursday @ The Shabby Chic Cottage
• Strut your Stuff Thursday @ Somewhat Simple
• Favorite Things Friday @ A Few of my Favorite Things
• Frugal Friday @ The Shabby Nest
• Home and Family Friday @ Home is Where my Story Begins
Wednesday, August 11, 2010

Whatever Wednesday -- Sweet Fireflies

I made this cake for a friend's birthday.  All she wanted was "something cute with fireflies".  I made the cake from scratch, used homemade buttercream frosting and the little fireflies are made from store bought gum paste.  It was pretty easy.  Too bad I had a little person who kept poking it so the finish isn't totally smooth.

What do you think?


I'm linking to these sites.  Go check them out!

• Show and Tell @ Blue Cricket Design
• We Did it Wednesday @ Sew Much Ado
• Transformation Thursday @ The Shabby Chic Cottage
• Strut your Stuff Thursday @ Somewhat Simple
• Favorite Things Friday @ A Few of my Favorite Things
• Frugal Friday @ The Shabby Nest
• Home and Family Friday @ Home is Where my Story Begins

Wednesday, August 4, 2010

Whatever Wednesday -- Cutest Little Bows

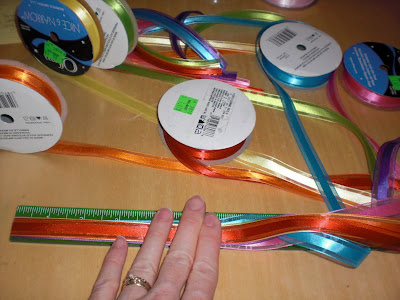
Aren't these the cutest little things you have ever seen?  I love them.  I first saw jumbo ones made out of paper at Christy's Creative Chaos.  I loved them so much I decided to try and make them out of ribbon.  I showed you how to do that here.

I love how easy they are and how quickly they go together.  My only problem with them is how heavy they are when you use a hot glue gun to put them together.  I was thinking about it while I was falling asleep the other day and when I woke up I knew just how to do it with a needle and thread.  I tried it today and I love it!  I made some mini ones using 1/2 inch ribbon, but you could yse the same technique to make bigger ones.

Mini Bow Tutorial
  • 1 yard 1/2 in. ribbon
  • scissors
  • ruler
  • matching needle and thread
Cut your ribbon in the following increments.
  • 4 - 6 in. pieces
  • 2 - 5 in. pieces
  • 1 - 2 in. piece
  1. Starting with your long pieces, make a loop in each end and have it meet in the middle.  Follow the pictures to see what it is supposed to look like.
  2. Holding the loops with one hand, stick your needle up through the middle of your ribbon.
  3. Continue making loops and stick them on your needle.  You will want each set of 2 ribbons to make an X and then offset the X's so that it fans out like a bow.
  4. After you are done with all of the long pieces, use the medium pieces and do the same thing.
  5. With your last piece make a single loop.
  6. This could be a little tricky, Holding the loop, push the needle up through it and then feed the needle back down through all of the ribbon.  Then tie it off on the underside of your bow.
  7. There you have it!  If you want to make bigger bows, just use 1 in. ribbon and double the length of each piece.
You could use these to wrap packages, embelish scrapbook pages, on hair clips or headbands.  I think I'm going to glue some alligator clips to the back of these for my girls.  What do you think? 

I'm linking to these sites.  Go check them out!

• Show and Tell @ Blue Cricket Design
• We Did it Wednesday @ Sew Much Ado
• Transformation Thursday @ The Shabby Chic Cottage
• Strut your Stuff Thursday @ Somewhat Simple
• Favorite Things Friday @ A Few of my Favorite Things
• Frugal Friday @ The Shabby Nest
• Home and Family Friday @ Home is Where my Story Begins

Wednesday, July 28, 2010

Whatever Wednesday -- Chalkboard Makeover

First off, thanks to everyone who links up to my Messy Monday and Transform Tuesday parties.  I have so much fun reading your posts and always come away with several great ideas.

Today I'm going to show you a super quick project that takes little time, little supplies, but has a huge impact.

Super Cute Chalkboard
  • chalkboard
  • scrapbook paper
  • scissors
  • Mod Podge
  1. Cut strips of paper to fit over the edges of your chalkboard.
  2. Glue them onto your chalkboard with Mod Podge.
  3. Cover the paper with Mod Podge to seal it.
Done!  I know just where I'm going to put this little cutie.  I won't show you just yet.  I promise you'll see it soon though.

Hope you have a super great day!

I'm linking this up to these sites.  Go check them out!

• Show and Tell @ Blue Cricket Design
• We Did it Wednesday @ Sew Much Ado
• Transformation Thursday @ The Shabby Chic Cottage
• Strut your Stuff Thursday @ Somewhat Simple
• Favorite Things Friday @ A Few of my Favorite Things
• Frugal Friday @ The Shabby Nest
• Home and Family Friday @ Home is Where my Story Begins

Wednesday, July 21, 2010

Whatever Wednesday -- Word Blocks

My friend Maryle asked me if I would help her finish a project and of course I said yes.  They are word blocks.  Someone gave her all of the parts.  All she had to do was put them together.  So we put a movie on for the kids, got out the Mod Podge, and got to work.

There are 15 blocks.  Each block has 4 letters (or shapes) on it.  A solid color on the top and a number on the bottom.  The number is so you can use the key to spell the words you want.  My friend's stuff was all DIY and the key my friend had was photo copied, but it originally came from Cranberry Hill Mercantile and is called Spell-A-Bration.  I tried looking on their website for anyone interested, but had no luck.

The pictures are self-explanatory.  Like I said, the key we used was a copy, but it was clearly copyrighted.  I have called Cranberry Hill Mercantile to see if I can share this with you all.  I have't heard back yet, but when I do I will update this post and let you all know.  Thanks for understanding.  Either way, I'm sure you all can appreciate a really great craft!!!!


Thanks for stopping by The Pumpkin Patch.  I hope you...

I'm linking this up to these sites.  Go check them out!

• Show and Tell @ Blue Cricket Design
• We Did it Wednesday @ Sew Much Ado
• Transformation Thursday @ The Shabby Chic Cottage
• Strut your Stuff Thursday @ Somewhat Simple
• Favorite Things Friday @ A Few of my Favorite Things
• Frugal Friday @ The Shabby Nest
• Home and Family Friday @ Home is Where my Story Begins

Wednesday, July 14, 2010

Whatever Wednesday -- Paper Flower Recycling

Remember these flowers?  I love them and they have been sitting on my kitchen counter.  Over the last few weeks my counters have gotten terribly cluttered and as I cleaned them off today I decided to do a little decor rearranging too.  This is what they looked like before.

I pulled out all of my vases and glass containers and tried the flowers in every different container I could think of.  My Mom, who has been visiting but has to leave tomorrow :( suggested I make Sundae's out of them.  At first I thought she was crazy, but once we tried it, I really loved it.  Just right for summer!  So I layered some glass beads into some parfait glasses and then added the flowers and a straw to each of them.  Cute right?

I wanted one of them to sit higher than the other so I took a small star candle holder and flipped it over to use as a base.  It was the perfect height, but wouldn' stay steady.  So I used cornstarch clay as cement and so far so good.  The two parfait glasses looked cute by themselves, but I thought it needed something else.  I took an old butter dish and flipped the lid over to use as a banana split bowl.  I stuck the two together using cornstarch clay and then filled it with beans so the flowers had something to push into.  Then I added a spoon and prest-o change-o a cute summertime centerpiece (or counter top display).

So, what do you think?

I'm linking up to these sites.  Go check them out.

• Anti-Procrastination Tuesday@ New Nostalgia
• Take a look Tuesday @ Sugar Bee Craft Edition
• Show and Tell @ Blue Cricket Design
• We Did it Wednesday @ Sew Much Ado
• Transformation Thursday @ The Shabby Chic Cottage
• Strut your stuff Thursday @ Somewhat Simple
• Favorite Things Friday @ A Few of my Favorite Things
• Frugal Friday @ The Shabby Nest
• Home and Family Friday @ Home is Where my Story Begins

Wednesday, July 7, 2010

Whatever Wednesday -- When I grow up...

E is 7 years old and just started taking piano lessons.  She loves it and is doing quite well.  She came to me a couple of days ago upset.  When I asked her what was wrong she said she can't decide what she wants to be when she grows up.  She wants to play the piano, sing, and do art, but she can't decide which one she wants to do the most.  I just smiled at her and told her that she didn't have to choose just one.  She could do all of them if she wanted to.  She was very happy with that and went back to whatever she was working on.

It made me think of all of the things I wanted to be/do when I grew up.  I've done some of them and I've tried some others.  Like I wanted to grow up and get married and have kids.  check, check, and check.  Bungee jump.  check...never doing it again, not even for a million dollars, but check.  Run a 1/2 marathon.  check.  (and training for another one)  Be a teacher.  check...not the way I had originally thought, but I still did it and do it everyday.

There is one thing that I've ALWAYS wanted to do and haven't.  I want it so badly that fear of failing is keeping me from taking the leap of faith and doing it.  Do you have one thing that you want more than anything, but you are afraid of trying?  Oh...you want to know mine?  Well...I have always wanted to be a writer.  I want to write a novel that actually gets published.  I want someone to send me a letter and tell me that my book changed their life and thank me for writing it.  I want it so bad I dream about it.  I have actually started writing it and then I put it away.  I think about it almost everyday, but I just can't make myself pull it back out.  I am paralyzed by my fear that no one will like it and even worse, that it won't help even one single person.

There, it's out.  I told you.  And I actually feel somewhat relieved.  Isn't that interesting?  Do you think less of me?  Do you think I'm crazy?

What is the one thing you have always wanted to do, but for whatever reason haven't?  Leave me a comment and tell it to the world.

We get back in town tonight, so I will be able to answer emails and etsy orders and see all of the fabulousness that you all have linked up.  Can't wait.

Wednesday, June 30, 2010

Whatever Wednesday -- Marshmallow Fondant

I love the look of a cake covered in fondant, but I can't stand the taste of store bought fondant.  I stumbled across this recipe a little over a year ago and have never looked back.

Marshmallow Fondant
  • 1/4 cup butter
  • 1 (16 oz.) bag mini marshmallows
  • 4 Tbsp water
  • 1 tsp vanilla extract
  • 2 pounds confectioners' sugar, divided
Directions
  1. Place butter in a shallow bowl, and set aside
  2. Place the marshmallows in a large microwave-safe bowl and microwave on high for 30 - 60 seconds to start melting the marshmallows.  Carefully stir the water and vanilla extract into the hot marshmallows and stir until the mixture is smooth.  Slowly beat the confectioner's sugar, a cup at a time, until you have a sticky dough.  Reserve 1 cup of powdered sugar for kneading.  The dough will be very stiff.
  3. Rub your hands thoroughly with butter, and begin kneadint the sticky dough.  As you knead, the dough will become workable and pliable.  Turn the dough out onto a working surface dusted with confectioners' sugar and continue kneadint until the fondant is smooth and no longer sticky to the touch.  5 to 10 minutes.
  4. Form the fondant into a ball, wrap it tightly in plastic wrap, and refrigerate overnight.  To use, allow the fondant to come to room temperature, and roll it out onto a flat surface dusted with confectioners' sugar.
This stuff is great!  It actually tastes pretty good too.  It is very important to refrigerate overnight.  It is much harder to work with it you try and use it immediately after making it.  I forgot to take a picture of it before I used it, so I got this picture from the net.

Come back Friday to see my most recent cake.  I promise you won't want to miss it.

Wednesday, June 23, 2010

New You Challenge

I don't know how many of you have noticed the "New You" tab on my sidebar.  If you haven't noticed it, then you are missing out on a really great opportunity!  If you don't want to read the whole post, I'll give you the Cliff's Notes version.
A really great friend of mine emailed me in February and asked me if I wanted to run a half marathon with her in October.  I said YES!!!  We decided to do the walking training schedule first, and then to follow the running training schedule second.  We started at the beginning of April and this weekend our walking schedule is done!  I can't believe it!  We have both done 1/2 marathons before, but it was atleast 1 kid ago for each of us.

I've learned/remembered several things during this process.  First, this is a major time committment, but definitely worth it!  Second, there is nothing sexy about pushing 4 kids on the stroller while dripping sweat from every possible pore in my body.  Third, I have officially graduated from the "spring chicken" category.

About a month ago I was reading my friend's blog and she posted about these amazing new shoes she got.  She said that wearing them while working out has made all of the hip pain she was feeling go away...completely.  I have been having knee pain, hip pain, and lower back pain since I started training, but just assumed it was because I'm not as young as I used to be.  As soon as I heard her talk about these shoes, I was interested.  My husband and I did some major research on these particular shoes, and decided to give them a try.

They are called Vibram Five Fingers.  They look really strange don't they?  I've only had them for about 2 weeks, but so far so good!
 

This is the kind I got.  I wore them to walk in for the first couple of days.  They feel weird the first few times you wear them and they are a bit tricky to get on at first, but it doesn't take long to figure it out.  My friend said that it would take a week or two to get used to them and to the way your feet will feel in them, but after the initial "breaking in" period, they will be the BEST shoes you have ever worn.  So far, I agree with her.  It did take about a week and a half to get used to them, but now I really like them.  Best of all?  All of my knee, hip, and lower back pain is gone. Completely gone!  However, my feet have felt a little sore when I finish running.  You know, like the soreness of being on your feet all day.  Not real pain, just a bit sore.  For now I am assuming it is because my feet and body aren't quite used to "running barefoot".

I wear mine ALL of the time.  I wear them to the grocery store, to the mall, around the house, and to the gym.  I get a lot of comments on them and even more weird looks.  I am loving the fact that my knee, hip, and lower back pain are gone.  I am interested to find out if the "sore" feeling in my feet goes away.  I haven't decided if I am going to train for the 1/2 marathon in only these, or if I'm still going to wear my running shoes too.  I plan to just take it a day at a time and see how my feet feel.

If you are interested in getting some, you can order them directly from their site, or you can find a licensed retailer to get them from.  We ordered mine from REI.  Here is what they look like on my feet.

Are you interested in joining the NEW YOU challenge?  Just leave a comment saying you want in on the fit and fun.  Every Sunday night I change the training schedule listed on my sidebar so you know exactly what you are supposed to be doing on what day.  I am not a licensed trainer, but if you have questions or need help with something I will do my best to help you.  So, let's get moving!!

DISCLAIMER:  I am not a Dr.  I am not an athletic trainer.  I am a stay at home mom who likes to run.  That's all.  In my research on these shoes I saw lots of people who think they are the absolute best things invented and lots of people who think they are the absolute worst things invented.  They are not for everyone.  You may really like them, or you may hate them.  Just don't hate me for recommending them.  :)

I am linking this up to these sites.  Go check them out!!

• Show and Tell @ Blue Cricket Design
• We Did it Wednesday @ Sew Much Ado
• Transformation Thursday @ The Shabby Chic Cottage
• Strut your stuff Thursday @ Somewhat Simple
• Favorite Things Friday @ A Few of my Favorite Things
• Frugal Friday @ The Shabby Nest
• Home and Family Friday @ Home is Where my Story Begins

Wednesday, May 19, 2010

Happy Birthday Giveaway!!

Saturday is my Birthday.  I'm going to be 33...Aaaahhhhh!  What better way to celebrate than with a giveaway?!

So here's the deal....I'm going to give one lucky person $30 to spend in my etsy store and a $25 giftcard from your choice of Hobby Lobby, JoAnn Fabric, Michaels, or Home Depot and some of these oh-so-tasty red velvet cake balls.  Ok, just kidding on the cake balls.
 

Here's a sneak peek at what's in my store.

Seriously people...who could pass this up?!  The giveaway starts now and goes until Sunday night (11:59 pm eastern time).  There are 3 super easy ways to enter.

1.  Become a follower and leave me a comment telling me so.
2.  Go to my etsy store and look around.  Then come back and tell me your favorite thing.
3.  Tell your friends!  Give my birthday giveaway a shout out on your blog, facebook, or twitter and leave me a comment telling me what you did.

p.s.  My Messy Monday and Transform Tuesday linky parties are still going on so LINK IT UP!!

I want to have a HUGE birthday party, so I am linking this up to EVERYONE!